Watch the video for an overview of setting up your M-1 and follow the guide below for step-by-step general instruction.
Setup
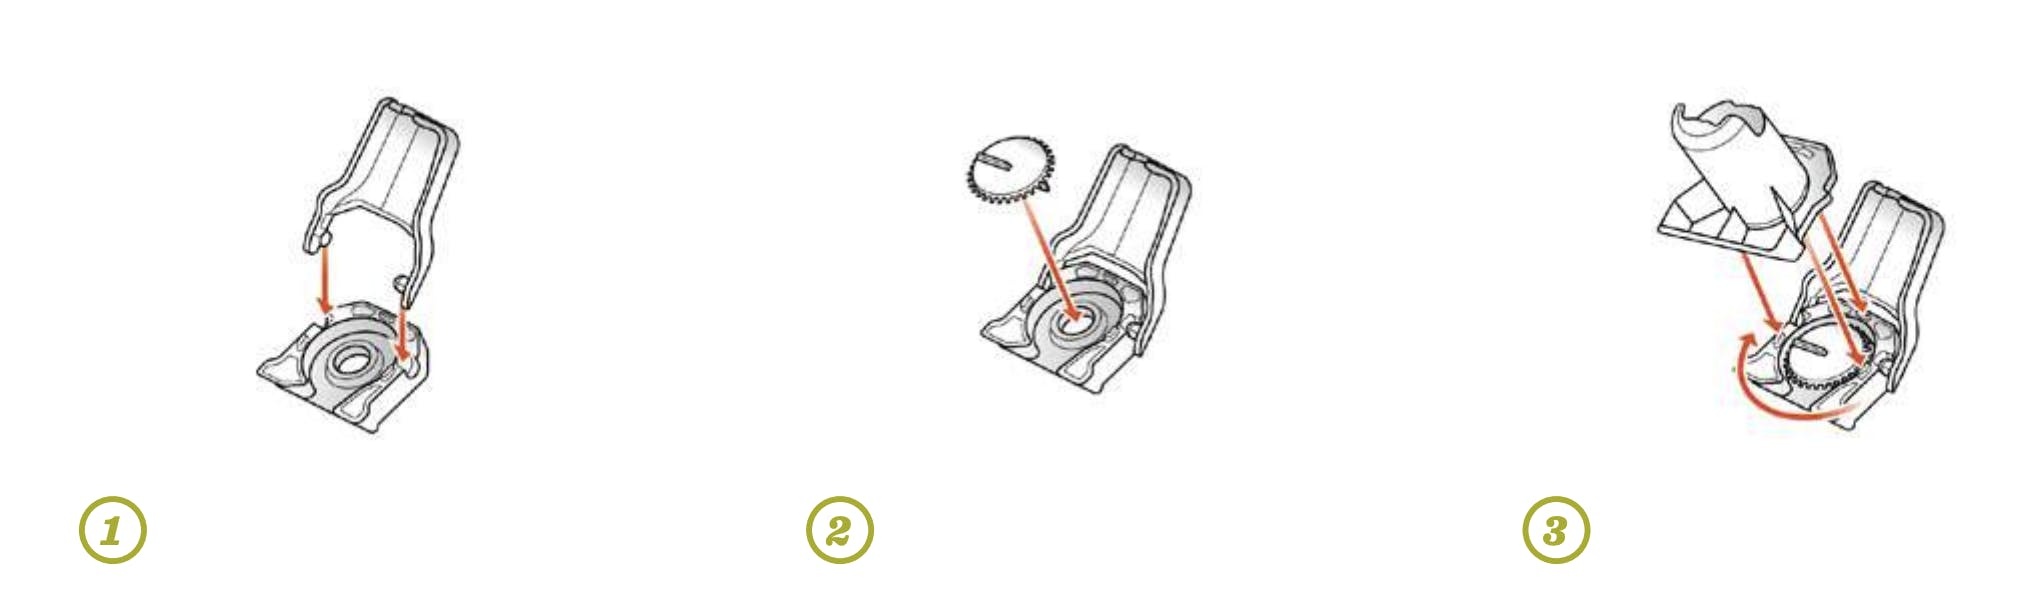
1. Attach Hopper Door to the Hopper Base by inserting the Hopper Door knobs into the cutouts on the Hopper Base, holding completely open.
2. Position the Grinder Blade onto the Hopper Base.
3. Position Hopper on the Hopper Base by aligning the Hopper slightly offset from the Hopper Base so that the cutouts line up with the tabs on the Hopper Base, twist clockwise on Hopper Base until it locks into place.
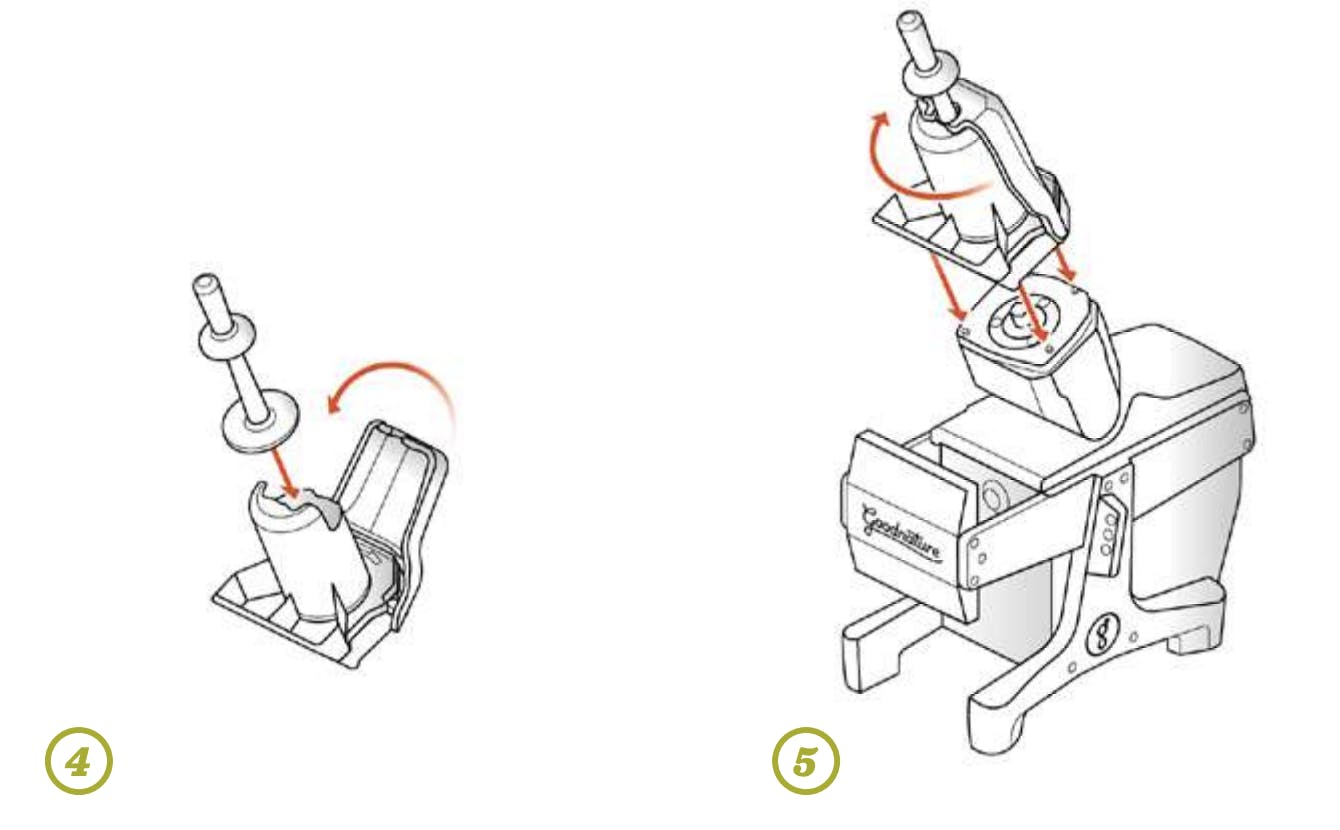
4. Insert the Pusher all the way into the Hopper, the Pusher Handle is tapered in order to allow the hopper door to open and close with the Pusher installed all the way into the Hopper. Close the Hopper Door.
5. With the Grinder Motor Housing in the UP position, place the assembled ReadyGrind™ Kit onto the four posts of Grinder Motor Housing, and twist clockwise to lock.
Press Kit Setup
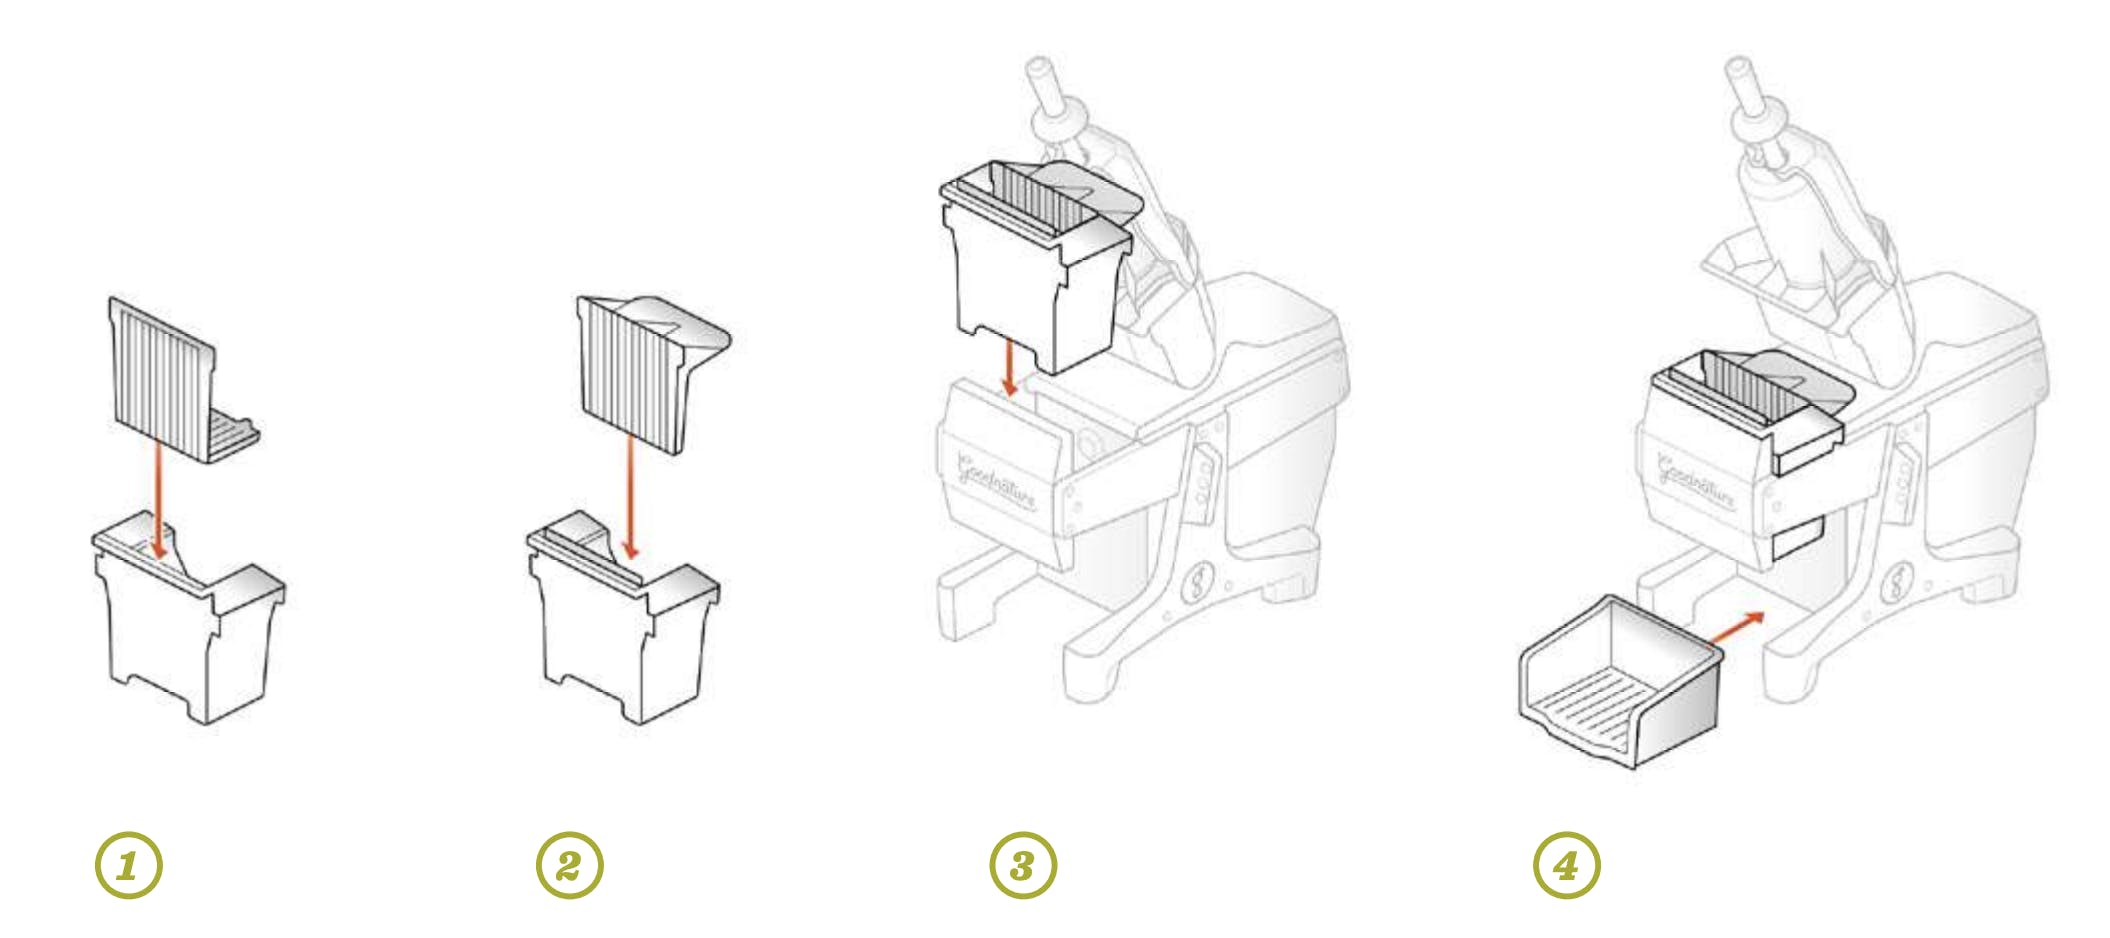
1. Insert the Press Rack into the Press Chamber. The Press Rack will fold to allow alignment of the bottom tab with the cutout in the bottom left of the Press Chamber.
2. Insert the Moving Platen into the Press Chamber with the draining grooves facing forward towards the front of the press and with the bill on top.
3. Place the assembled Press Kit into the press area of the machine. The Press Chamber should rest on top of the Fixed Platen and the side rails of the press. Slide the Moving Platen to the back of the Press Chamber.
4. Move the Drip Tray into position under the press area of the machine. It will stop when it makes contact with the front of the machine.
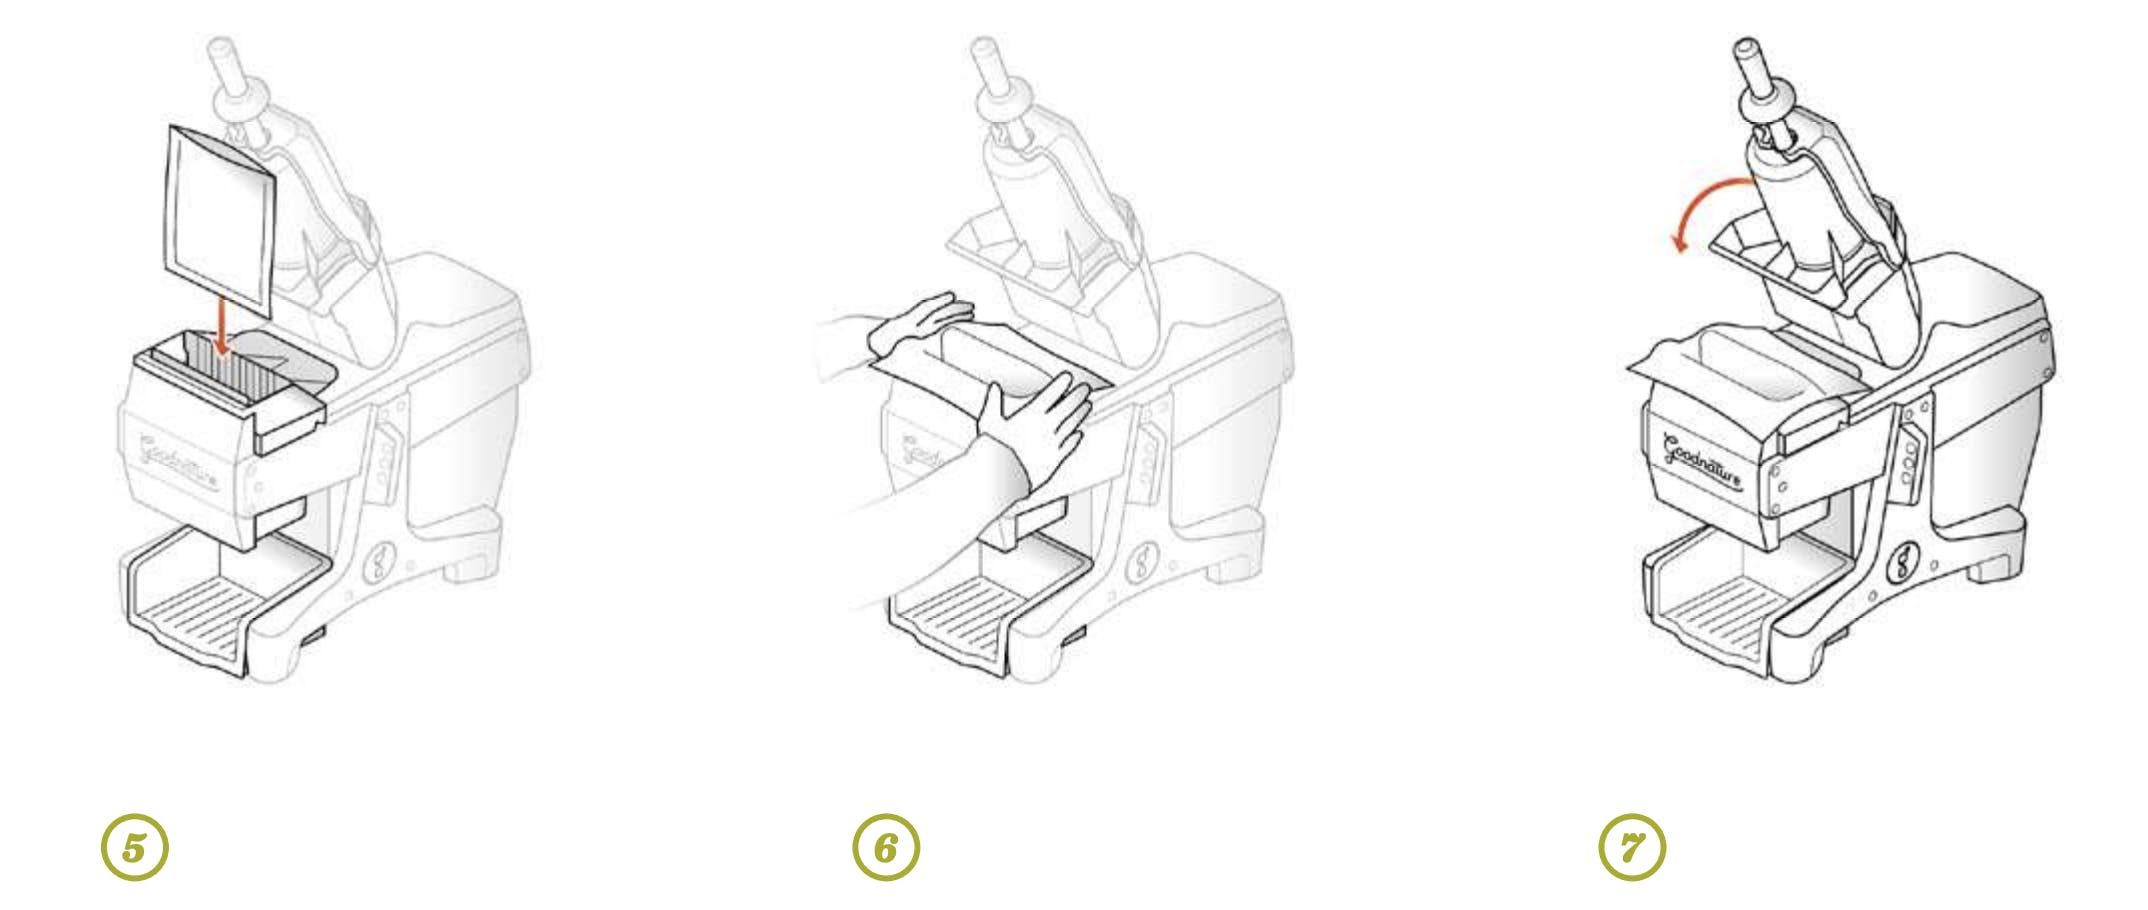
5. Place one FreshFilter® Press Bag into the Press Chamber.
6. Open the top of the bag so that the excess material rests on the front of the Press Chamber and on the Moving Platen.
7. Lower the grinder to the DOWN position.
For more detailed information on setting up the M-1, refer to the M-1 Owner's Manual. For product and ordering information, visit the M-1 product page. To order new parts and press bags, visit the M-1 parts page.