Watch the video for an overview of operating your M-1 and follow the guide below for step-by-step general instruction.
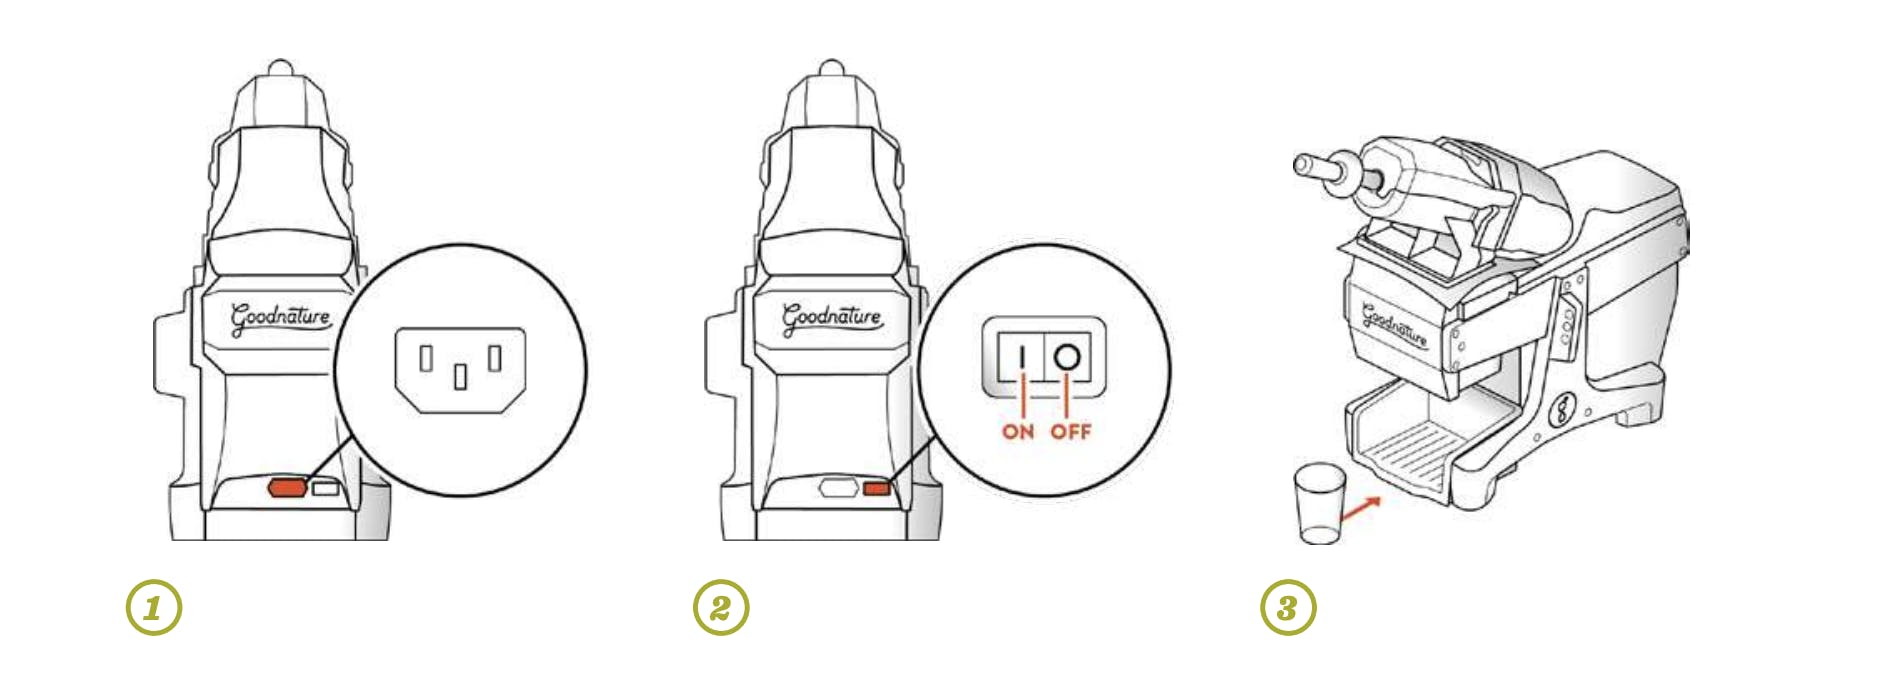
1. Plug the M-1 Power Cord into the receptacle located on the back of the machine. With the machine power switch in the OFF ( O ) position, plug the power cord into a wall outlet.
2. Push the power switch to the ON ( I ) position. You will hear the fan turn on once the machine has power.
3. Place an empty cup on the Drip Tray.
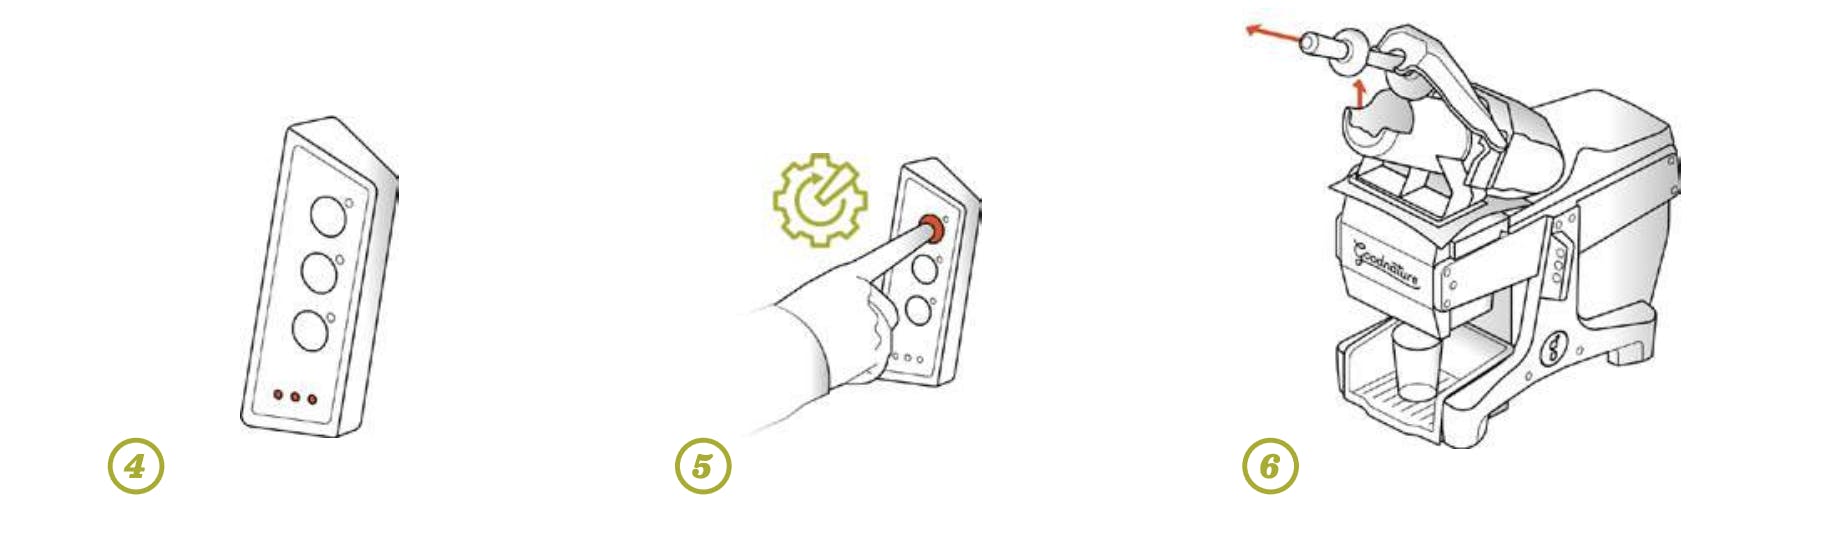
4. Check that all three bottom lights on the Button Panel are illuminated. This indicates that all three safeties are in the correct position.
5. Push the GRIND button to turn on the grinder.
6. Pull the Pusher out until it stops and rest the Pusher in the notch on the Hopper as shown.
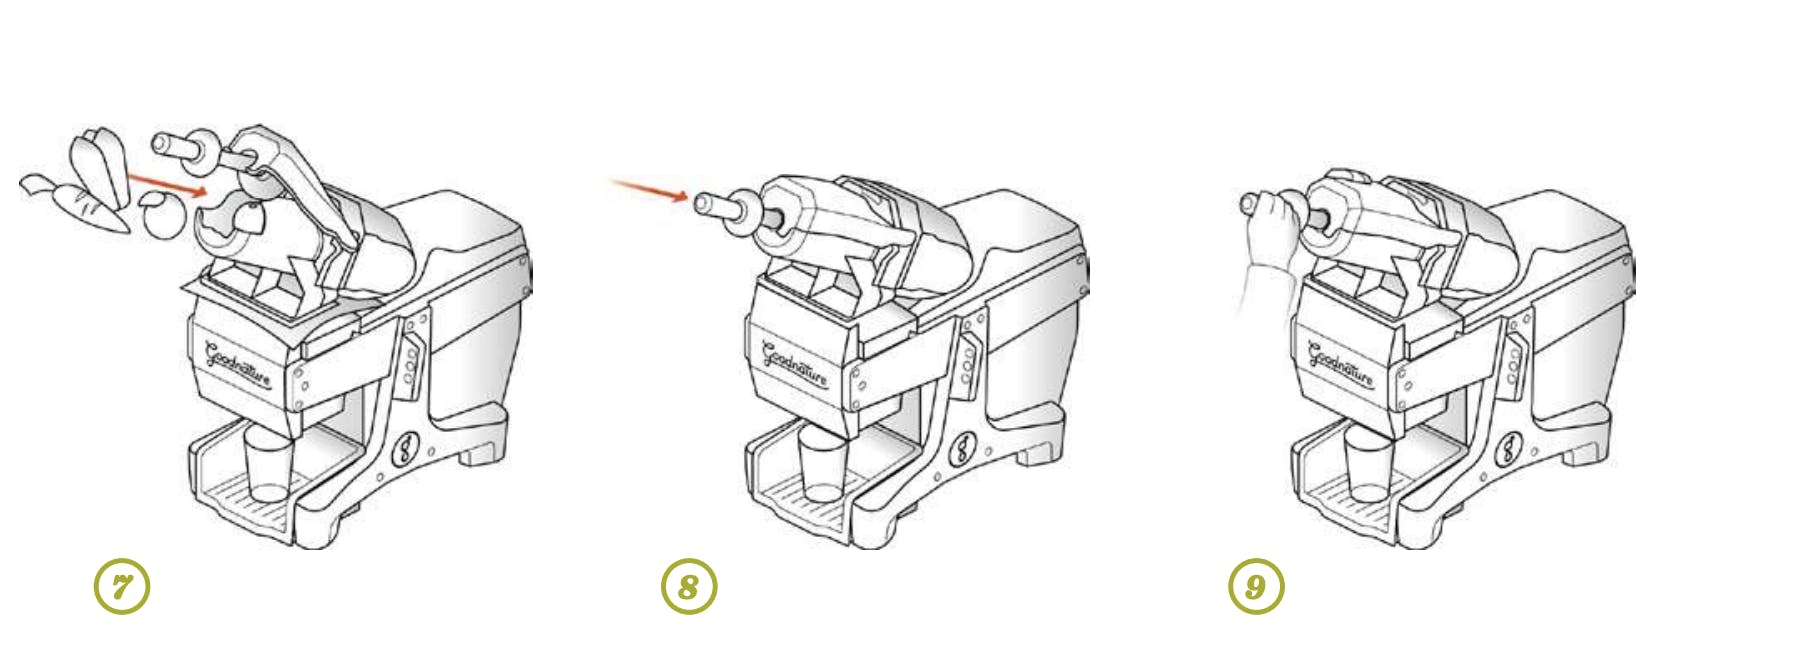
7. Fill the Hopper, up to 2/3 full, with the desired produce.
8. Close the Hopper Door by lowering the Pusher. Be sure the Hopper Door is completely closed.
9. Place one hand on the Hopper Door applying firm pressure, and with the other hand, apply gentle pressure to the Pusher. The produce will grind slowly into the press bag. Some vibration in the grinder and Pusher is normal. Continue grinding produce until the Hopper is empty.
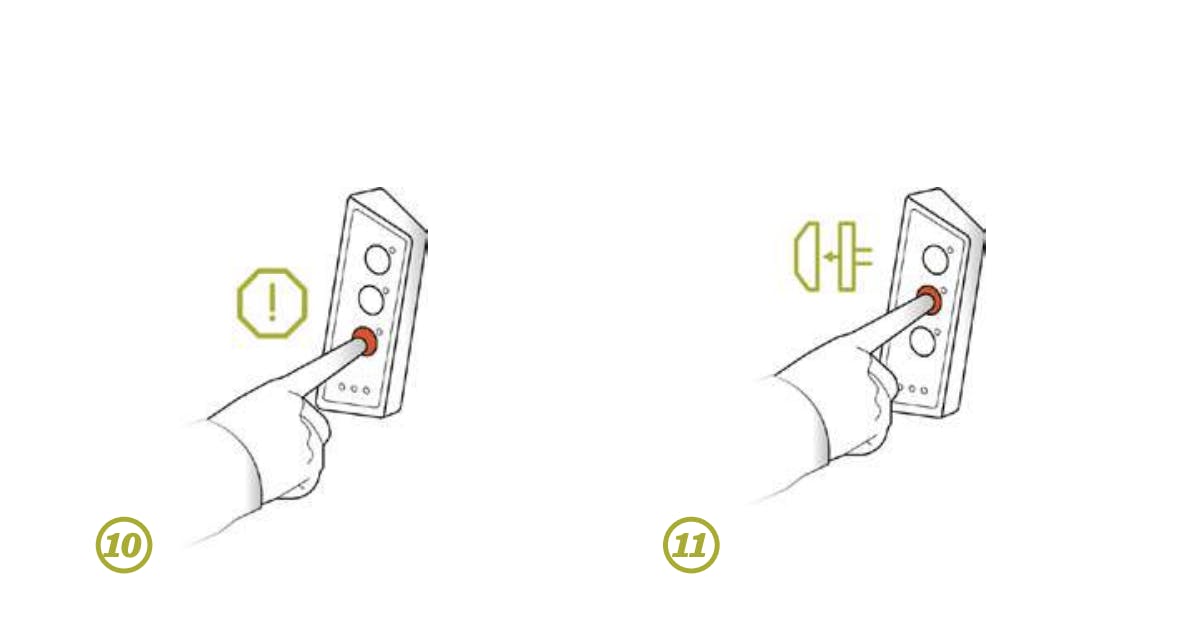
10. Once grinding is complete, push the GRIND or STOP button to turn off the grinder.
11. Before starting the press cycle, check to make sure the press bag is evenly filled and is not over-filled. Push the PRESS button to begin the press cycle.
Pro Tips: If it seems that the Pusher is not making any progress, twist the pusher clockwise and counterclockwise until the blockage is cleared. At the end of the grind cycle, twist the pusher clockwise, 1-2 full turns. This will ensure that the Hopper is cleared of produce.
12. The press will stop automatically when the cycle is finished, about 90 seconds. At the end of the cycle, move the grinder to the UP position, then push the moving platen back away from the press bag filled with pulp and remove the press bag from the press chamber.
13. Your juice is ready to serve!
14. If switching quickly to a new recipe, swap out ReadyGrind™ Kit with a clean one, replace the press bag, and you are ready to go.

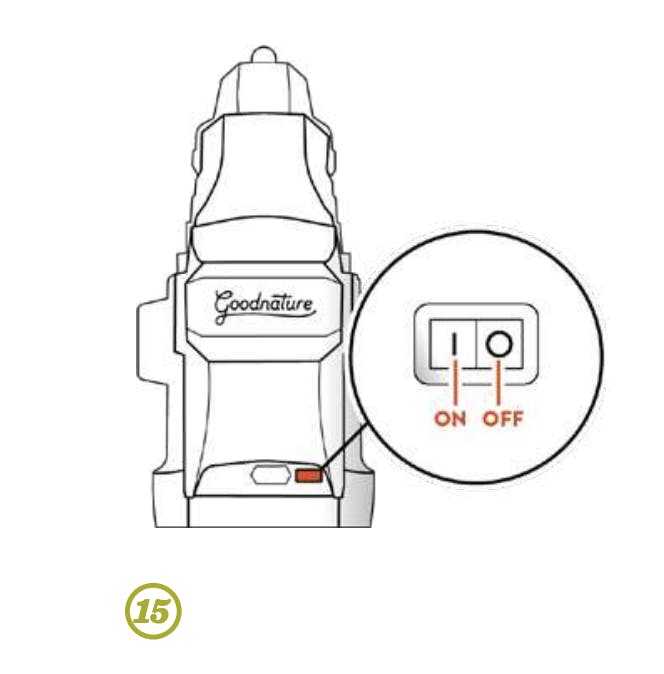
15. When you are finished, turn the power switch to the OFF (O) position.
Pro Tip: If you are testing a recipe for the first time, have an extra cup or container on hand and be prepared to catch any possible overflow.
For more detailed information on operating your M-1, refer to the M-1 Owner's Manual. For product and ordering information, visit the M-1 product page. To order new parts and press bags, visit the M-1 parts page.