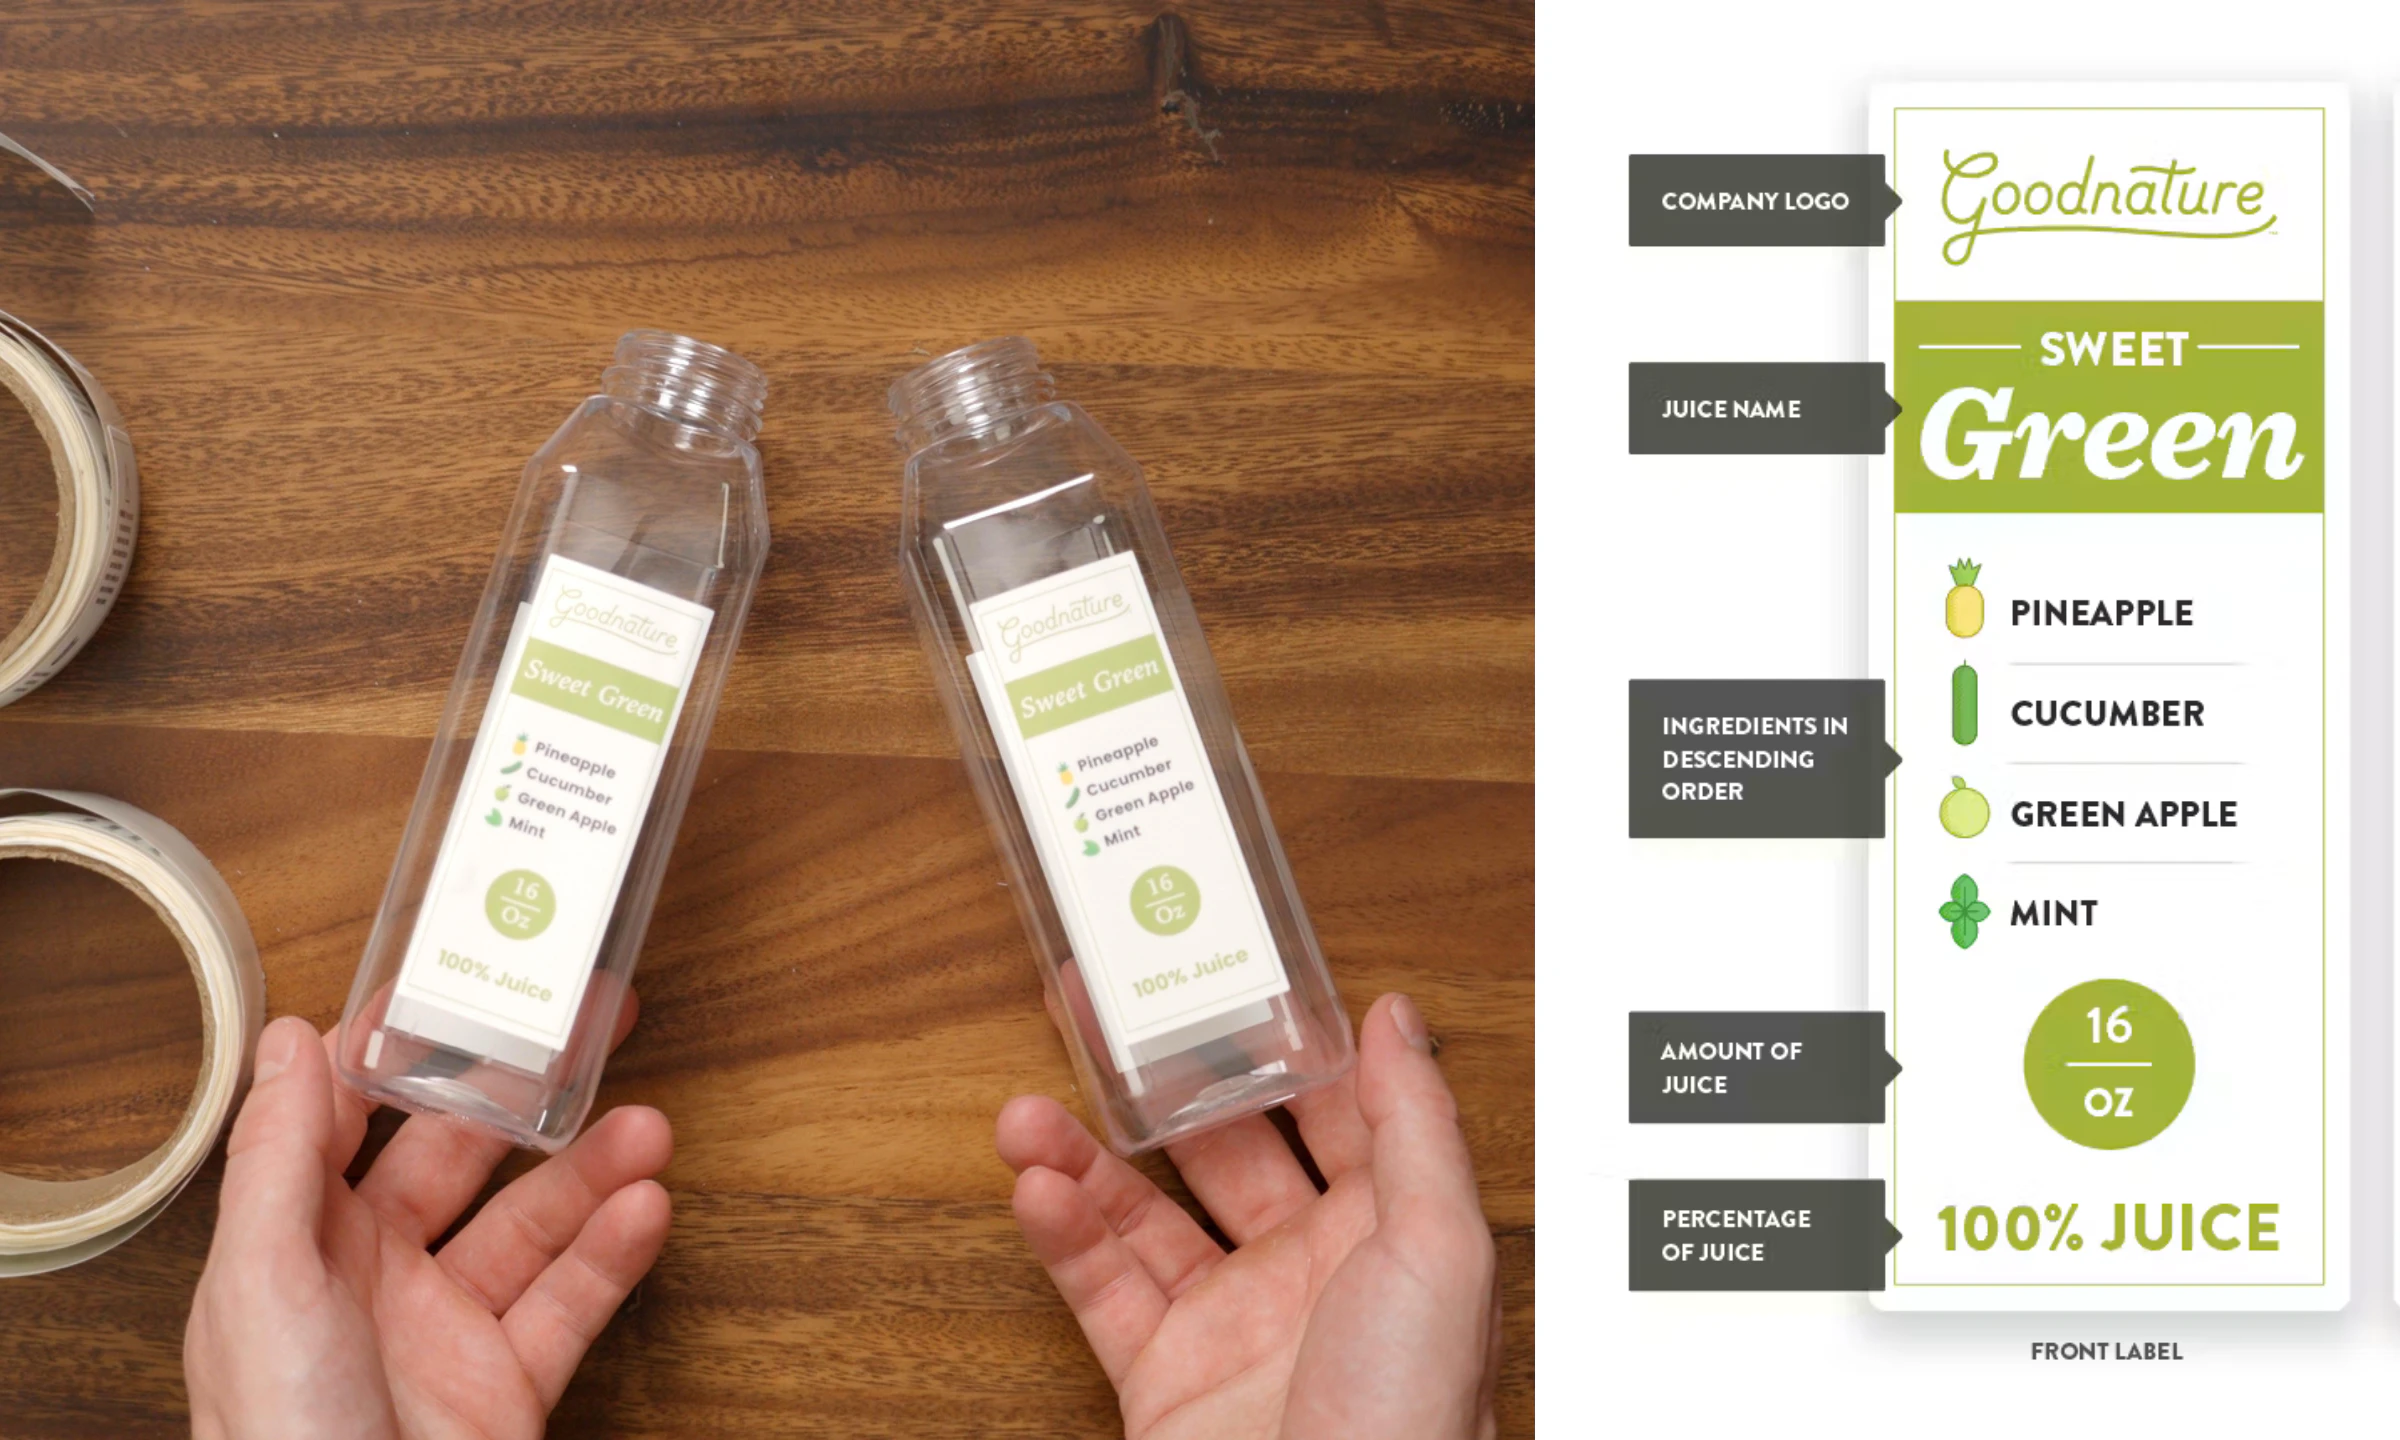
You can design a professional front and back cold-pressed juice bottle label in Canva in about fifteen minutes. Start with label dimensions from your bottle's spec sheet, build from a saved brand template (hopefully set up by a designer), and finish with the required unpasteurized warning on the back. I'm Charlie Wettlaufer, second-generation owner of Goodnature. Below is the exact process I use, step by step.
Canva is my preferred design software. It was built from the ground up so marketers who aren't trained designers can still make good-looking work. That describes most juice bar owners I know.
Questions about juicing?
Ask Goodnature and get an answer in seconds.
Before you open Canva: get your brand into a template
If you can, have your brand designed by a real professional. It will look much better. When they're done, ask them to load your brand template into Canva. Canva lets you save your brand fonts, colors, and logos in one place.
This saves a lot of clicking. You won't need to dig up hex codes or font names every time you make something. You just click the color or text style you want.
I had my designer load our updated Goodnature branding into Canva. I use it constantly for social posts, the website, and the blog, and it has saved me a lot of time and headaches. Canva is web-based, so you can also open your designs from any computer or your phone.
If you're still working out what your brand is, start there before you design anything. Step 1 in How to Open a Juice Bar: 8 Steps is developing a unique brand identity, not copying someone else's.
If you'd rather have help, Goodnature offers branding, logo, and juice bottle label design as a service. Learn more about our juice bar consulting services.
Here is the example label design I walk through step by step below. I highly recommend following along in the video.
Step 1: Get your label dimensions from the bottle spec sheet
Your first job is finding the size of the label area on your bottle. For plastic bottles, I recommend Captiva Containers. They're based in Miami, have great customer service, ship right away, and are reasonably priced. Fo glass bottles, I recommend Stanpac, based in Ontario, Canada.
No matter who you buy from, you should be able to get a spec sheet for the bottle. That sheet lists the label dimensions and shows a diagram of the label area.
The spec sheet for the bottle I used lists a label area of 1.25 in × 4.75 in. I went smaller, at 1.25 in × 3 in, for a simple rectangular front label. I had three reasons:
- Smaller labels are easier to manage. Labels that are too big can cause a lot of issues when you apply them.
- Smaller labels cost less. The bigger the label, the higher your cost per label.
- A plain rectangle is easy to apply. It sits cleanly on the front of the bottle.
One heads-up: when I ordered, I switched to a 16-ounce bottle, so my printed label ended up bigger than the one I describe here. I mention that in the ordering and applying video. Always confirm your bottle before you lock in dimensions.
Step 2: Create a custom-size design
In Canva, go to File > Create new design. Make sure the units are set to inches, then enter your width and height (1.25 × 3 in my case). Click create, and you'll have a blank canvas in your label's exact size.
Step 3: Add your logo
Open your brand template, keep the white background, and drop your logo in from the logo section. Then size it down and drag it near the top.
Two Canva tricks help here:
- Hold Alt (Option on Mac) while resizing so the element stays centered. Otherwise it resizes toward a corner.
- Watch the guides. As you drag, Canva shows a purple line down the middle when you're centered.
Pro Tip: Goodnature has consulted for over 500 juice bars and restaurants world wide, with brand design being offered as one of our service. Learn more about our juice business consulting services.
Step 4: Draw the border and lock it
For a thin edge border, go to Tools > Shapes > Rectangle. By default it's filled, so follow these steps:
- Set fill to none.
- Choose a solid stroke.
- Set the stroke to 1 pixel.
- Change the stroke color to your brand color.
Hold Alt and drag the rectangle out to frame the label. Then lock that layer so you don't bump it while you design everything else.
Step 5: Add the colored name bar
Draw another rectangle. This time, leave it filled in your brand color. Hold Alt, stretch it to the edges of the border, make it a bit taller, and slide it up under the logo.
Next, click the text tool and choose the heading style from your brand template. Shrink the text and type the juice name. My example was Sweet Green. Make the text white and bold, then center it in the bar.
Step 6: Build the ingredient list and icons
I write the ingredient text first so I know where to line up the icons. Use your brand's subheading style and size it down. My Sweet Green list was pineapple, cucumber, green apple, mint. Then adjust the text:
- Left-align it using the alignment icon in the font settings.
- Make it bold.
- Skip pure black. Use your brand's dark color. We have a charcoal and one we call eerie, which is almost black but not quite.
- Adjust letter spacing to spread the letters a little. The right amount is different for every font.
- Increase line spacing so the list breathes.
For icons, go to Elements, search for an ingredient like pineapple, and click See all. There's an absolute ton to choose from. Pick a clean graphic style, shrink it a lot, and line it up with the matching line of text. Repeat for each ingredient.
Step 7: Add the size badge
Go to Tools > Shapes > Circle and make a green circle. Add text in a size that fits, type your volume (12 oz on mine), and make it bold and white.
I added a thin white line under it from Tools > Line, at 1 pixel in white, with 100% juice beneath. Then switch any elements that need it back to your brand green.
It isn't fancy, but it's clean, gets the job done, and looks great on a bottle.
Step 8: Duplicate for every recipe
Don't start over for each juice. Click the duplicate icon on the page to copy it, then swap out the name, ingredients, and icons. Your whole menu stays visually consistent, even when you're juicing in bulk and labeling large batches.
Step 9: Design the back label with the required warning
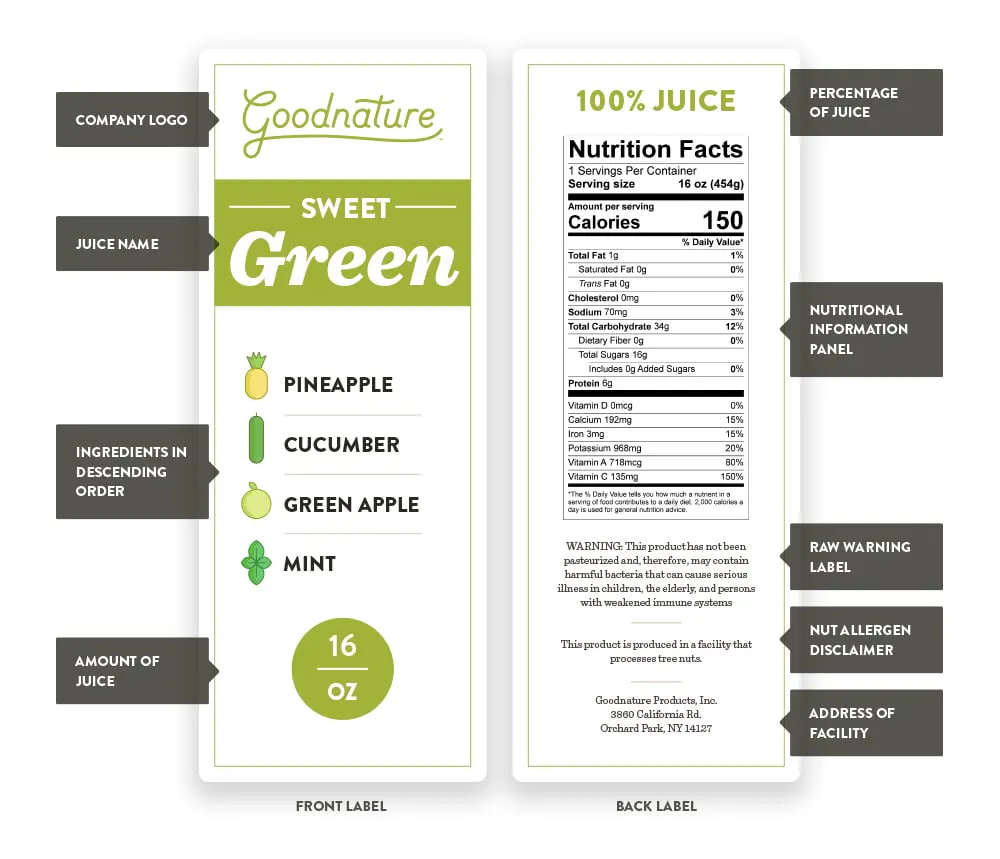
The back label is where the compliance text goes. Raw juice that isn't pasteurized must carry a warning. The statement says the product has not been pasteurized and may contain harmful bacteria that can cause serious illness.
Use the exact required wording from Juice Labeling Requirements rather than typing it from memory. According to that post, your label also needs:
- Your kitchen's name and address.
- Ingredients listed in descending order by weight.
That post also notes that small businesses with annual gross sales of no more than $500,000 don't need nutrition labeling under the FDA's guidance. Check your local rules too, and see these tips for navigating the health department.
On our labeling podcast, we also covered a few more items to include:
- The amount of juice in the bottle.
- The percentage of juice.
- Allergen statements, which for juice mostly involve nuts.
As we discussed in that same episode, plan your panels before designing: one, two, or three, and whether you'll include a nutrition panel. Chef Ari can prepare nutritional information for your juices if you need it.
Print on the right material
A beautiful label that smudges in the cooler is no good. As How to Bottle Juice for Sale points out, use water-resistant labels so condensation won't smear the text or make labels peel.
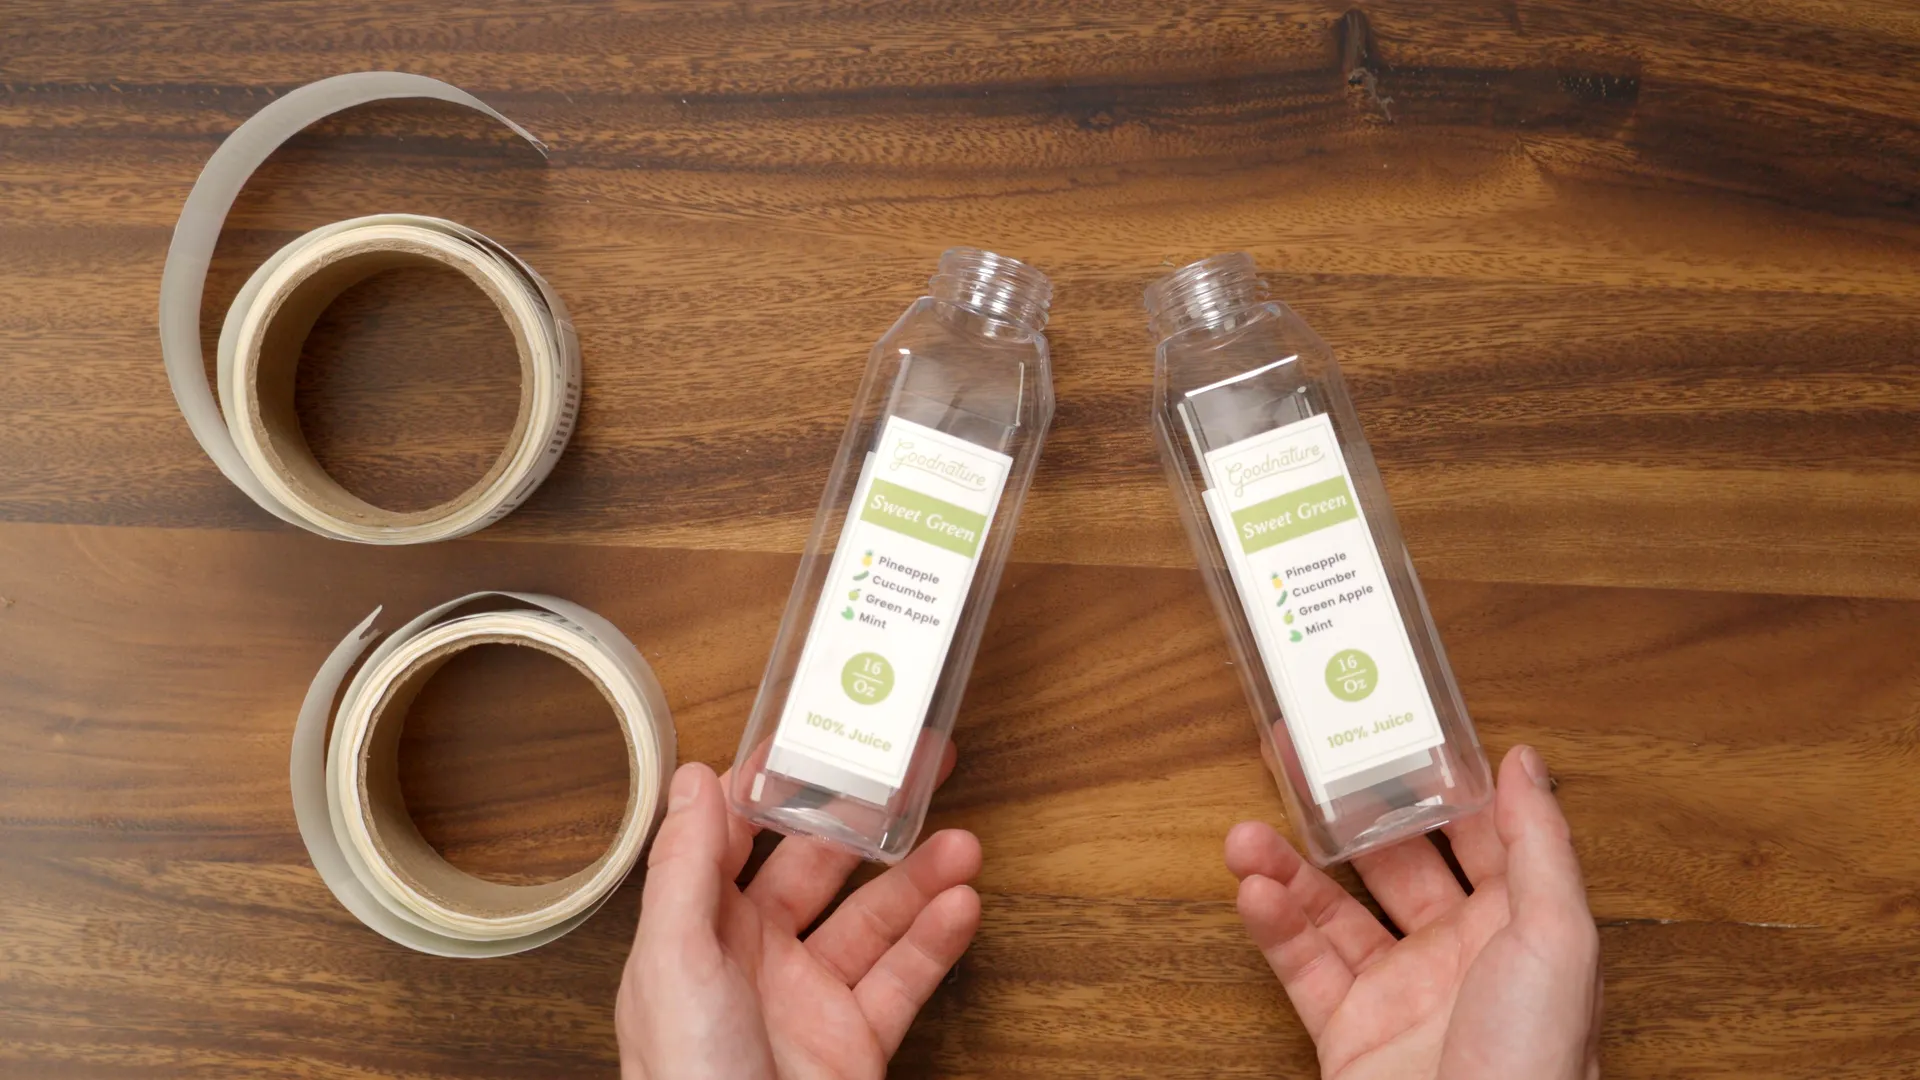
I order mine from Sticker Mule. They come on a roll that's easy to peel and apply. Part two of this series covers ordering and applying labels.
If you want hands-on help with recipes, food costs, nutrition info, or the health department, our consulting with Chef Ari is built for exactly that. Chef Ari is a classically trained chef who has worked with hundreds of juice bars, natural grocers, and luxury hotel brands.
FAQ
What size should a juice bottle label be? Check the label area on your bottle's spec sheet, then consider going a bit smaller. One plastic bottle I used listed 1.25 in × 4.75 in, and I designed at 1.25 in × 3 in. Smaller labels are easier to apply and cost less per label.
Do I need a designer, or can I just use Canva? Canva is built for non-designers, so you can make solid labels yourself. Your brand will look better if a professional designs it and loads the template into Canva for you.
What has to go on the back of a raw juice label? You need the FDA unpasteurized warning, your kitchen name and address, and ingredients in descending order by weight. Depending on your size and location, you may also need nutrition info. See Juice Labeling Requirements for specifics.
How do I make labels for multiple juices quickly? Duplicate your finished page in Canva, then change the name, ingredient list, and icons.
What label material should I use? Use water-resistant labels so condensation in the cooler doesn't smudge them or make them peel.
Helpful resources
Join Our Mailing List
Join our mailing list to get new juicing articles and recipes sent directly to your inbox.

About The Author
Charlie Wettlaufer
President and CMO - Goodnature Host - Cold Pressed Truth and Goodnature Radio Creator - JuiceCon
I’ve been around juicing all my life. My Dad built his first hydraulic juice press in 1976 and founded the company Goodnature Products, Inc. I have incredible memories of having “cider parties” when we would invite all the people in our rural neighborhood over to make apple juice. To this day, when I taste apple juice made on a Goodnature press, a rush of nostalgia runs through my body. I pride myself on guiding our clients into the world of cold-pressed juice and showing them how much fun this industry can be. I love talking business, technology, and marketing. My mission is to carry on my Dad's goal - one day make Goodnature a house-hold name.
Comment