Your M-1 comes equipped with safety features that prevent the grinder and or press from operating if it is not properly assembled or if the safety features are compromised. Follow the steps below to troubleshoot:
Step One
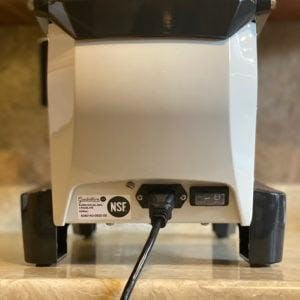
Make sure the machine is getting power by ensuring it is connected properly to the power source and is turned on.
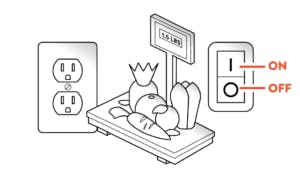
1. Plug the M1 into a wall outlet. Push the power switch (on back) to the on position. If you are operating in a commercial kitchen or a residential kitchen, local building codes and regulations may require the outlet to be a GFCI. If the wall outlet is a GFCI there will be a rest button on the outlet. Ensure the GFCI outlet is not tripped.
Step Two
In order for the machine to operate, all three safety lights at the bottom of the button panel must be illuminated solid.
When the power switch is first turned on, the lights next to and under the buttons will illuminate for the first two seconds according to the following:
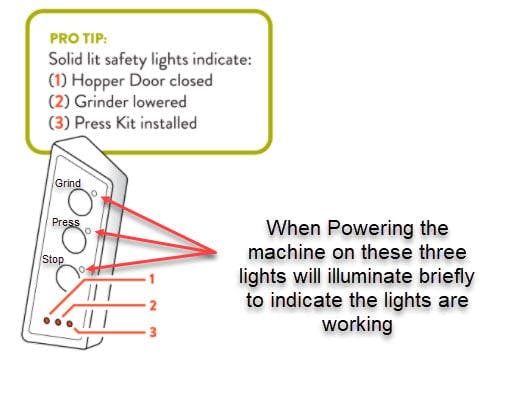
1. HOPPER DOOR: Light indicates that the Hopper Door on the ReadyGrind™ Kit is closed. Install onto the four screws mounted on The Grinder Motor Housing, twist clockwise until securely locked. When turning on the machine, the safety light 1 will blink and need to be reset to ensure the safety sensor is functioning properly prior to use. To reset: Open and close Hopper Door. The light should now be illuminated solid.
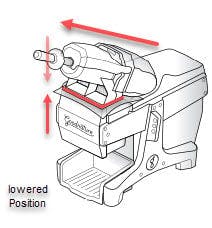
2. GRINDER: Light indicates that the Grinder assembly is in the lowered position.
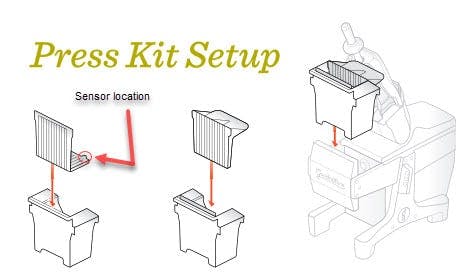
3. PRESS KIT Light indicates that the Press Rack and Moving Platen is installed inside of the Press Chamber.
Step Three
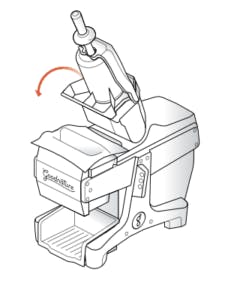
Make sure the ReadyGrind™ Kit is properly installed. The ReadyGrind™ Kit includes the hopper base, grinder blade, hopper, hopper door, and pusher.
1. Insert Hopper Door into the Hopper Base.
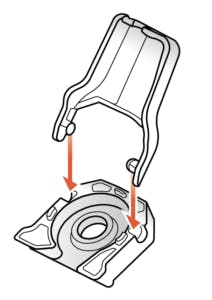
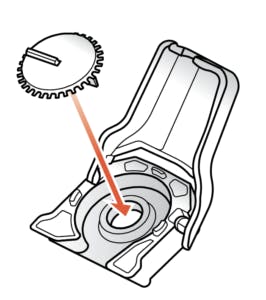
2. Position the Grinder Blade onto the Hopper Base.
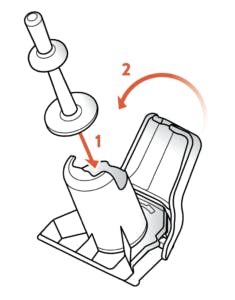
3. Position Hopper on the Hopper Base, aligning the tabs(1), and twist to lock(2).

4. Insert Pusher into Hopper(1), close Hopper Door(2).
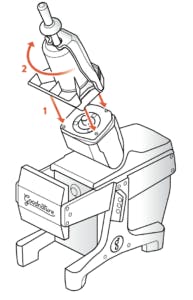
5. (1) With the Grinder Motor Housing in the upright position. (2) Place the assembled ReadyGrind™ Kit onto the four screws on the Grinder Motor Housing. (3) Twist the ReadyGrind™ Kit in a clockwise motion to lock it in place.
NOTE: After prolonged use, sometimes food can get caught in between the parts and prevent the sensors from reading properly. Cleaning the parts and reassembling can resolve the issue if that is the case.
If your machine is still not working after performing these troubleshooting steps, contact Goodnature technical support. For up-to-date support information go to www.goodnature.com/support.