Setting up the X-1 Mini Pro is an easy process that only takes a minute. Everything can be easily dropped and clicked into place. This video walks you through the process step-by-step.
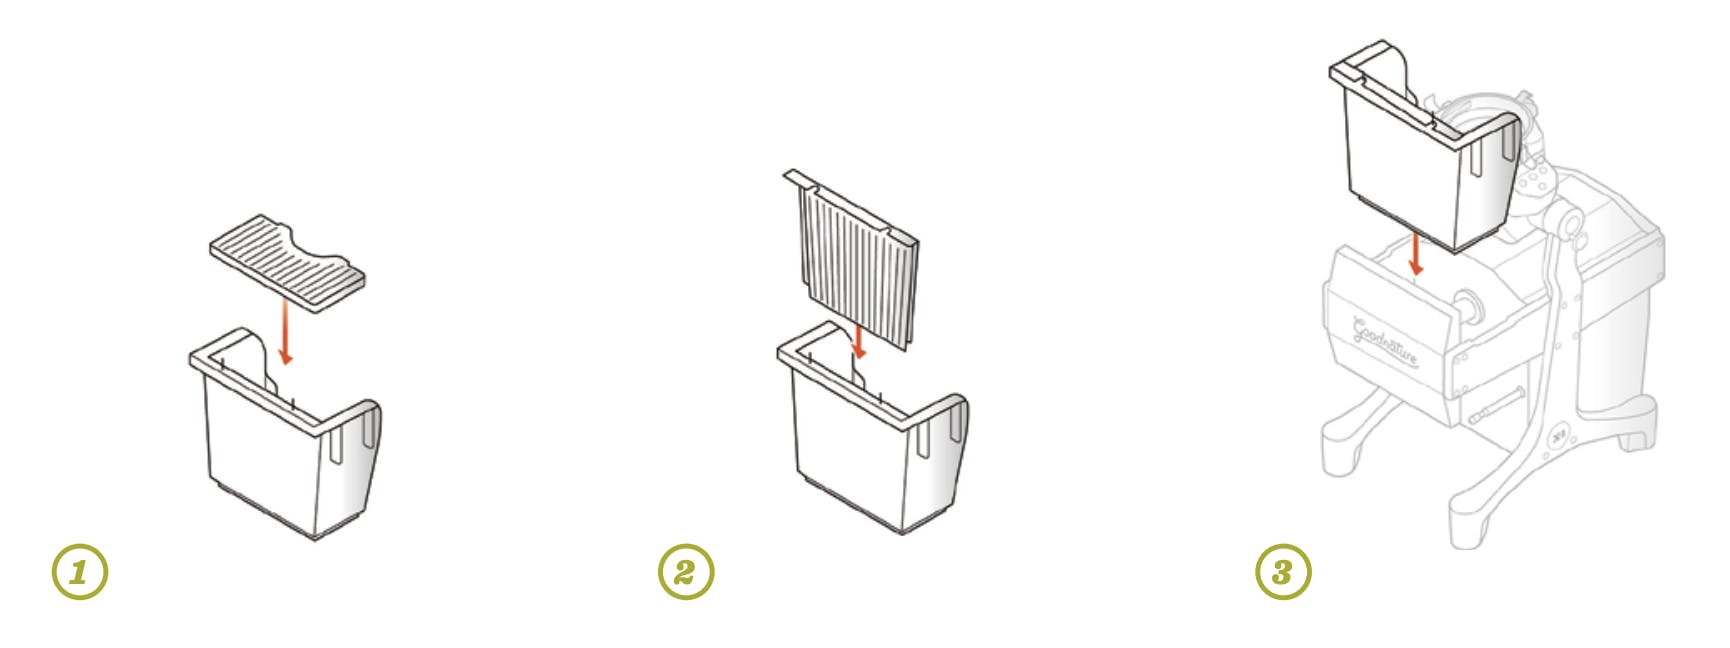
Press Setup
1. Insert the Bottom Press Rack into the Press Chamber, by sliding it down from the top of the chamber until it drops in place.
2. Slide the Front Press Rack into place. The round cutouts on the top edge should go around the pins in the Press Chamber.
3. Place the Press Chamber snugly into the front of the press.
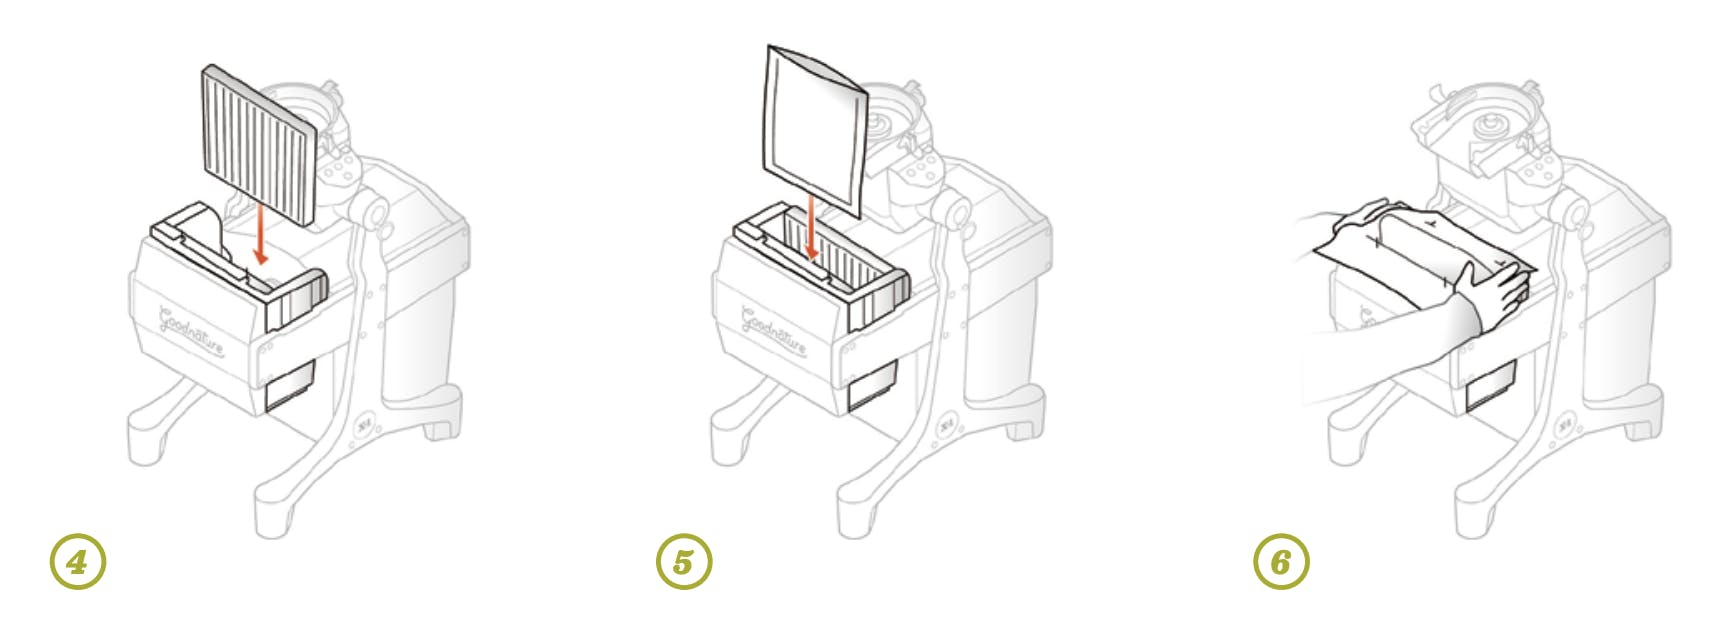
4. Place the Moving Platen snugly into the back of the Press Chamber, with the grooves facing toward the front of the press.
5. Place FreshFilter® Press Bag in the Press Chamber.
6. Push each side of the FreshFilter® Press Bag over the Bag Pins, so the pins are protruding through the bag.
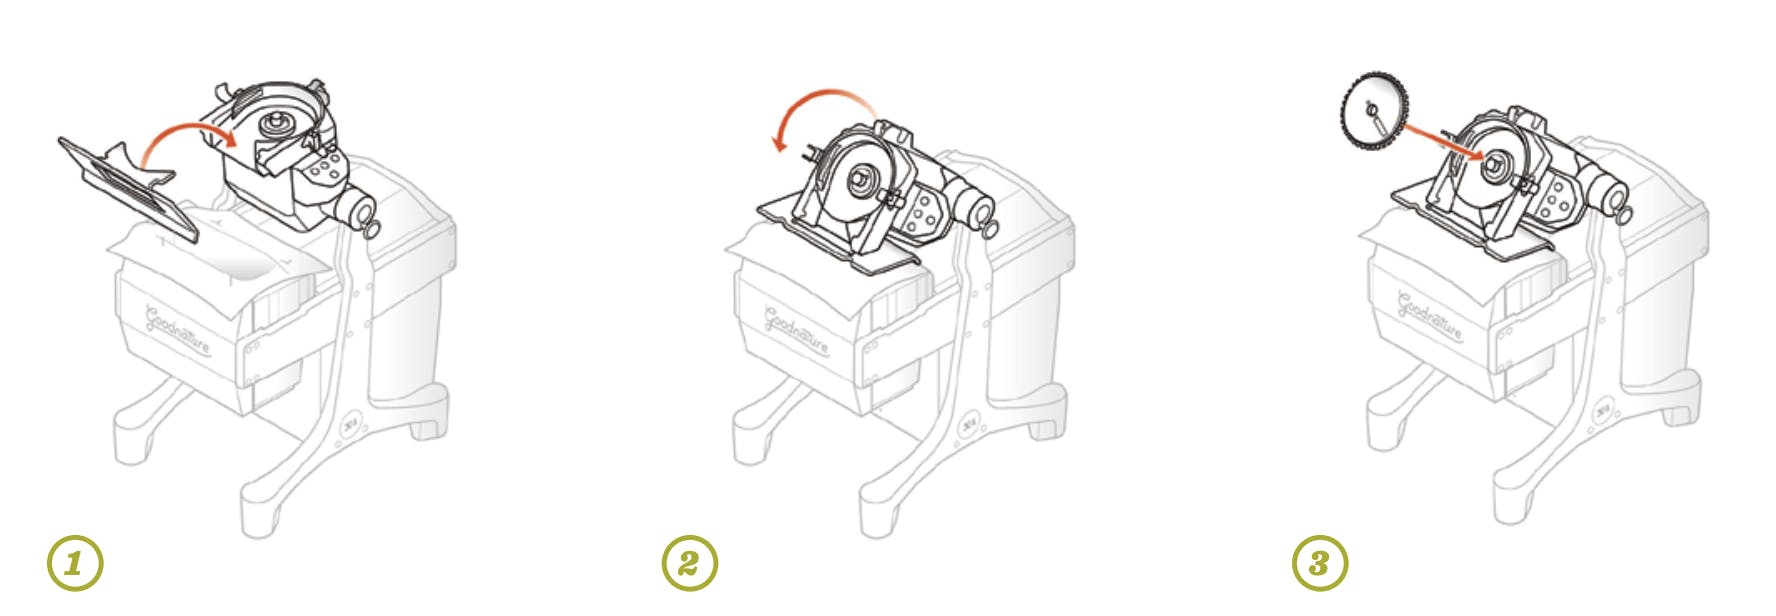
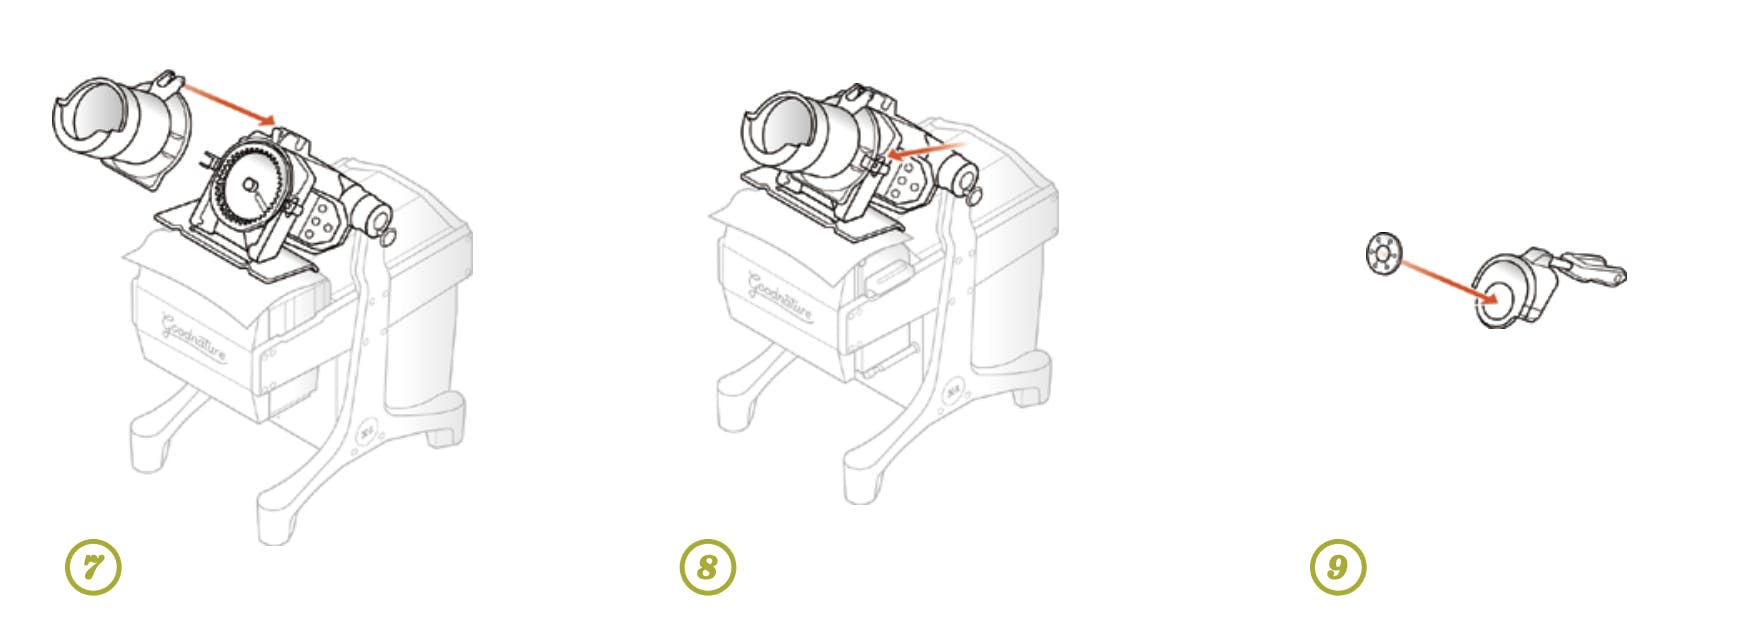
Herbivore® Grinder Setup
1. With the Grinder in the UP position, attach the Press Guard.
2. Lower the grinder to the DOWN position.
3. Place the Grinder Disc into the Grinder. Align pins with pin holes. Use caution when handling Grinder Disc assembly.
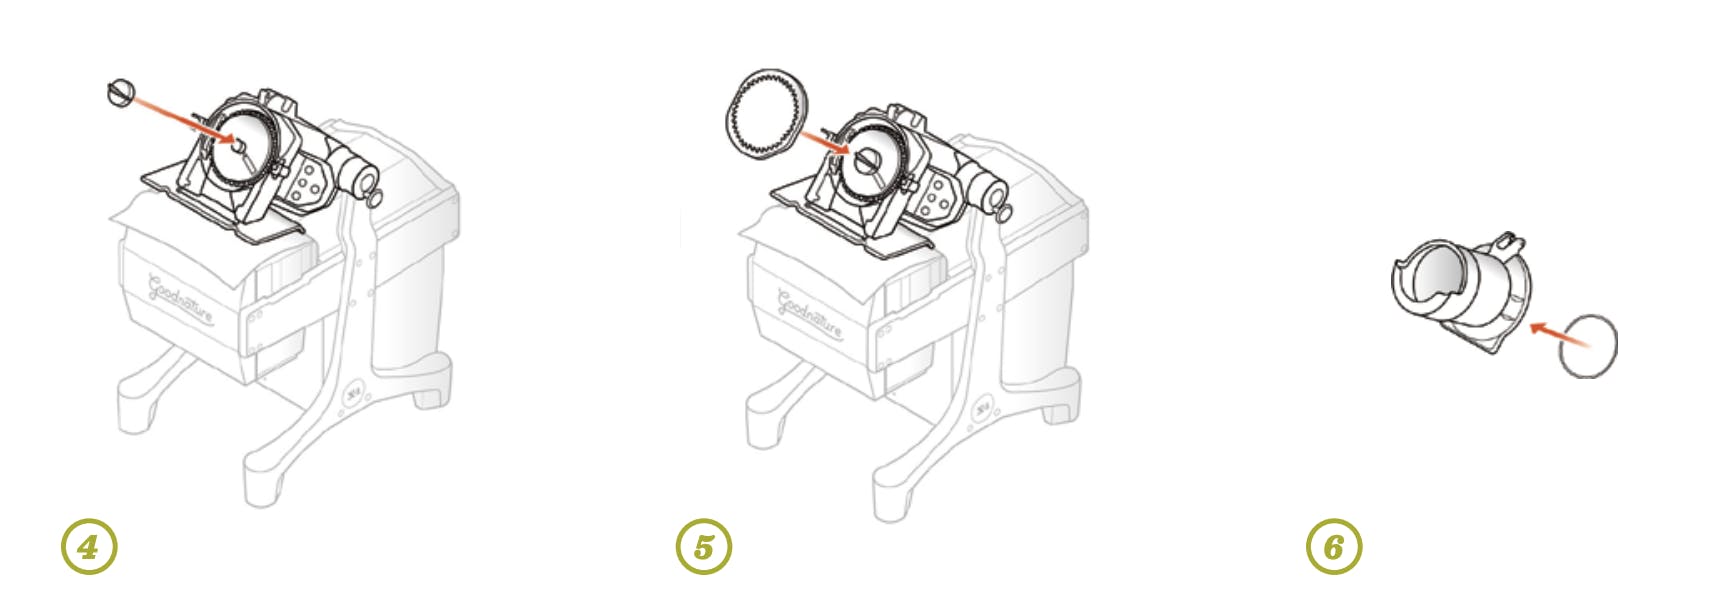
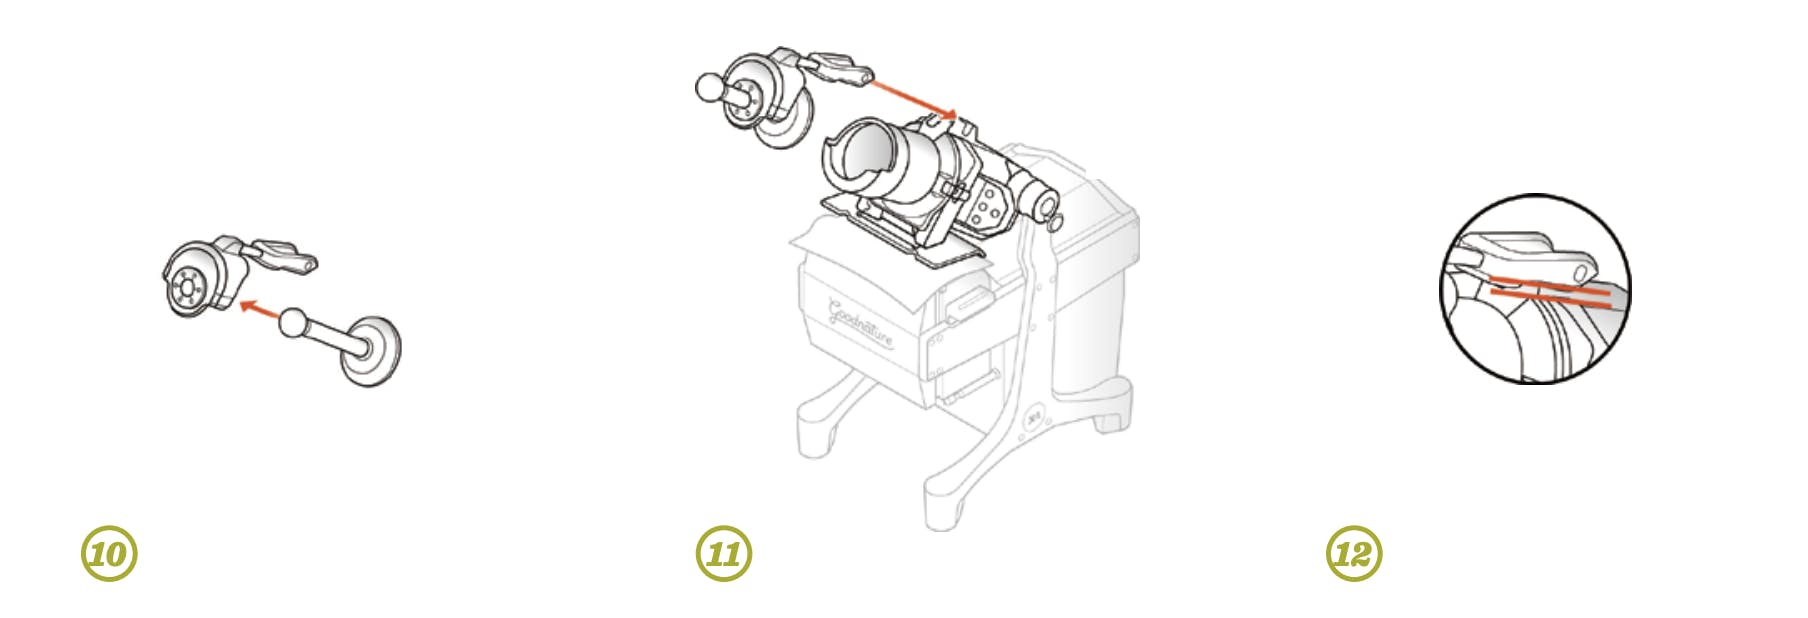
4. Screw the Agitator Knob onto the threaded rod until snug. Do not over-tighten.
5. Place the Grinder Ring into the Grinder, making sure “TOP” is at the top of the grinder, facing up.
6. Insert the orange hopper seal into the groove on the base of the hopper.
7. Attach the Hopper to the Grinder by aligning the pin on the Hopper with the black hook on the Grinder and push down firmly.
8. Clamp the Hopper in place using the clips on each side.
9. Insert the rubber Splash Guard into the Hopper Door.
10. Push the handle of the Pusher through the Hopper Door.
11. Place Hopper Door down onto the receiver.
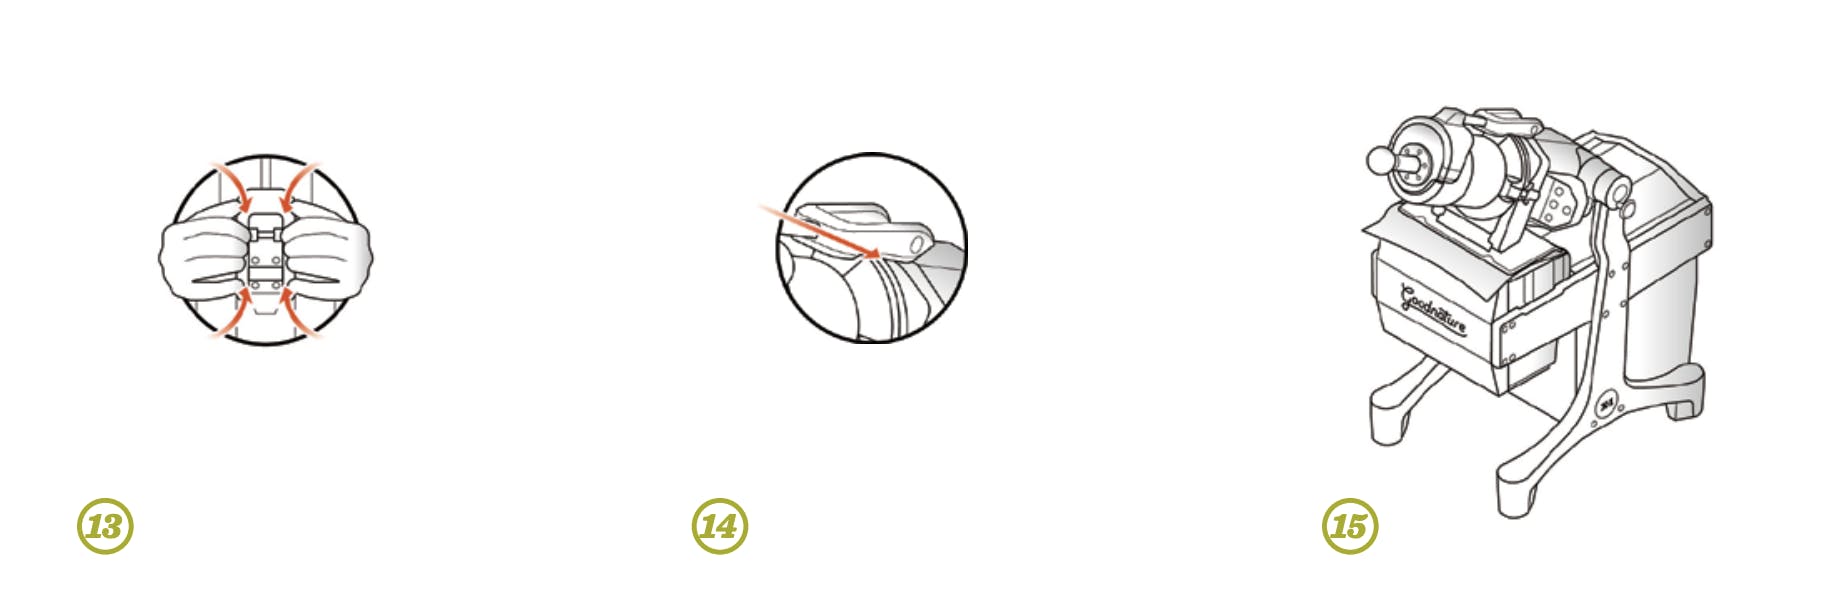
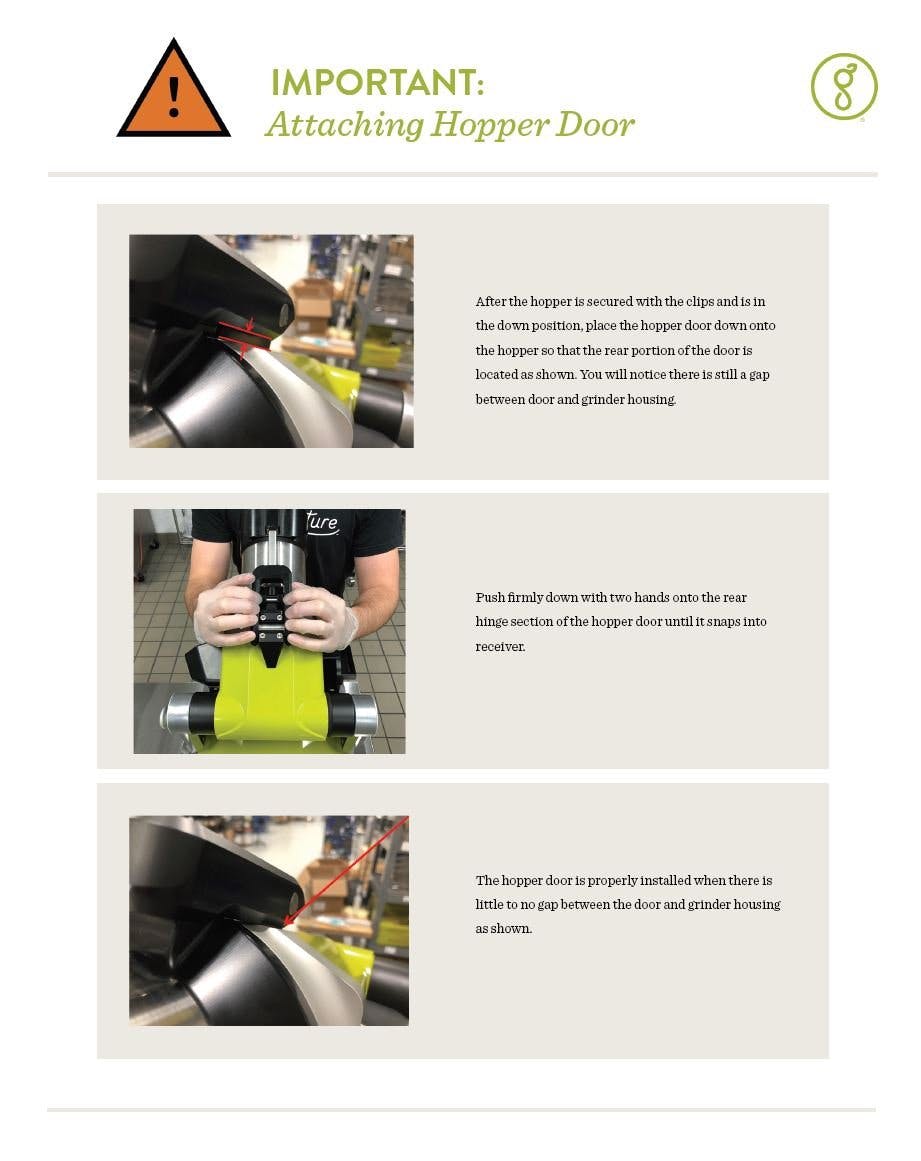
12. After the Hopper is secured with the clips and is in the down position, place the Hopper Door down into the receiver so that the rear portion of the door is located as shown. You will notice there is still a gap between door and grinder housing.
13. Push firmly down with two hands onto the rear hinge section of the Hopper Door until it snaps in place with an audible “click”. This may take a lot of force on a new machine.
14. The Hopper Door is properly installed when there is little to no gap between the Door and Grinder Housing.
15. Finally, lower the Hopper Door and Pusher into place, ready for operation.
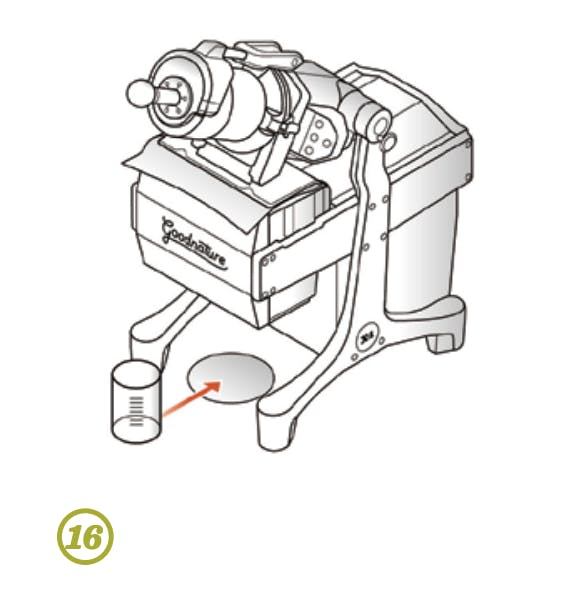
16. The vibration pad can be placed under a container of your choosing.
Attaching Hopper Door
For more detailed information on setting up the X-1 Mini, refer to the X-1 Mini Owner's Manual. For product and ordering information, visit the X-1 Mini Pro product page. To order new parts and press bags, visit the X-1 Mini parts page.